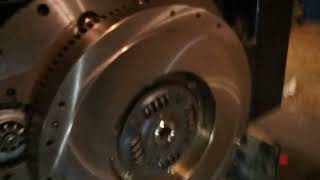
This is part 16 of an ongoing DIY clutch job on a split Boomer 40, showing actual reassembly steps: orienting the clutch disc correctly, installing PTO and shock absorber, cleaning old sealer and gunk off the flywheel with brake clean/acetone/Goo Gone, torque specs (60 ft-lbs flywheel, 20 ft-lbs PTO and pressure plate), and using a 3D-printed alignment tool. Best for owners already following this repair series or tackling their own clutch replacement.
Posted by the trac nunya channel, an owner doing his own hands-on clutch repair across a multi-part series.
What this video covers
Clutch disc flat side must face the pressure plate first
PTO and clutch cannot be installed backwards, they will not seat
Used red can brake clean (perk), then acetone, then Goo Gone on flywheel
Flywheel bolts torqued to 60 ft-lbs, four bolts
PTO and clutch pressure plate torqued to 20 ft-lbs
3D-printed alignment tool used since New Holland doesn't make one
Questions this video answers
How do you know if the clutch disc is installed backwards on a New Holland Boomer 40?
If the clutch isn't touching the pressure plate when installed, it's on backwards. The flat side should go in first so it sits flush against the pressure plate.
What torque specs are used for the flywheel and PTO on a New Holland Boomer 40 clutch job?
Flywheel bolts (four) are torqued to 60 ft-lbs since it's not specified in the book. PTO bolts (six) and the clutch pressure plate are torqued to 20 ft-lbs.
How do you clean old sealer and gunk off a New Holland Boomer 40 flywheel?
Use red can brake clean (perk) first, then acetone for sticky spots, and Goo Gone for gummy residue that acetone won't remove, available at Walmart or Lowe's.
How do you align the clutch and pressure plate on a New Holland Boomer 40 without the transmission shaft blocking the bolts?
A service alignment tool holds the clutch and pressure plate in place while starting the bolts, since once the transmission shaft is inserted the bolts become inaccessible.